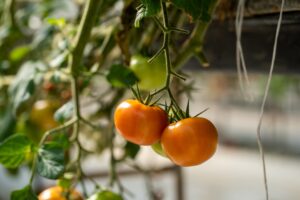
Step by step guide on planting tomatoes from planting stage to harvest
Step 1 – Sow seeds at the right time
Growing tomatoes from seed takes about six to eight weeks from sowing to transplanting. Starting seeds indoors too early results in leggy, overgrown seedlings. I aim to transplant my seedlings into the garden about a week after my last expected spring frost date. Find out the last frost date for your region and count backwards by six to eight weeks. That’s when you should sow your seeds indoors.
Step 2 – Use clean containers
I start a LOT of seeds each spring and want to be able to use my growing space efficiently. Therefore, I sow my seeds in plastic cell packs placed in 1020 trays. They’re reusable, have drainage holes, and I can cram hundreds of plants under my grow-lights. You can also use plastic pots or recycled clean yogurt containers, egg cartons, milk cartons, and so on.
Step 3 – Use a high-quality seed starting mix
Give your tomatoes the right start with a lightweight growing medium like Pro-Mix Seed Starting Mix. Moisten the mix before filling pots or cell packs to avoid uneven wetting. These growing mixes offer good drainage and are a combination of materials like peat, vermiculite, and perlite.
Step 4 – Plant seeds at the right depth
Tomato seeds are fairly small and if you plant them too deeply, you’ll never see them again. Sow them about one-quarter inch deep, covering lightly with moistened potting mix. Label each variety with a plastic or wooden tag and the name written in permanent marker (trust me, you won’t remember which is which if you don’t label them).
Step 5 – Provide plenty of light
Sturdy, healthy seedlings need plenty of light. Too little light results in legginess where the seedlings reach and stretch, eventually flopping over. The ideal place to start seeds is under a grow light, where you control the amount of light. My grow lights are inexpensive, four-foot shop lights hung with chains on a wooden shelf. As the plants grow, I can move my lights up so that they are always just a few inches from the foliage of my tomato plants. I leave the lights turned on for sixteen hours a day, and have a timer that turns them on and off. You can use a sunny window to start tomato seeds, but due to low light conditions in late winter, expect some stretching. If you plan on making seed starting an annual event, consider investing in a grow light, like this fluorescent fixture or a SunBlaster.
Step 6 – Maintain moisture
Overwatering is one of the quickest ways to kill delicate seedlings, so keep an eye on soil moisture. It should be slightly moist, but not soaking wet. A spray bottle is a handy way to moisten soil. Once seeds are sown, use a clear plastic dome or a sheet of plastic wrap overtop of the trays and containers to maintain moisture. Once germination occurs, remove all covers so that air can circulate. If you have a heat mat, you can use it to speed up germination as well as raise germination rates. Once half of the seeds have sprouted I turn the heat mat off.
Step 7 – Provide adequate air circulation
As indicated in my previous step, air circulation is important when growing healthy tomato plants. My grow lights are set up in my basement where there isn’t a lot of air circulation. This could lead to fungal issues if I didn’t have a small oscillating fan in the room to move air. Having moving air also toughens up the stems and foliage of the seedlings.
Step 8 – Feed the seedlings
Many potting mixes contain slow-release fertilizer to feed your plants slowly over several weeks. You can supplement these fertilizers with an organic water soluble fertilizer, applied at half the recommend rate every 12 to 14 days. Carefully read and follow all labels on potting mix bags and fertilizer containers.
Step 9 – Harden off tomato seedlings
You’ve reached the last step of growing tomatoes from seed! Once you’ve reached the final spring frost date, it’s time to harden off your tomato seedlings. Hardening off is the process where indoor-grown seedlings are acclimatized to the outdoor garden. Expect this process to take five to seven days (read more about hardening off HERE). Start by putting the seedlings outdoors in the shade for a few hours. Bring them back indoors that night. Continue to put the seedlings outside, gradually introducing them to more sun each day. They are be ready to be transplanted into the garden or containers within a week.